How To Create a Spook-Tacular Halloween Cloche
October 25, 2023
Pumpkin spice season is here. But more importantly, so is the spooky season! This is the perfect time to be in your #wednesdayadams era and decorate your house to the tee. Let your creativity shine, and try your hand at some scary homemade Halloween decorations.
DIYing Halloween decorations gives you some special one-on-one time with the kiddos. You can all get into a festive mood as you barrel right into the holidays. Give your house an added dash of your personality by letting your interests and personality shine alongside your festive decor. You could try many different Halloween projects, from fun DIY Harry Potter crafts to spooky skull centerpieces and more. Look, maybe I am biased but Halloween is one of my all time favorite seasons to decorate for.
If you’re unsure which festive DIY project to jump into and want to start with something totally doable, I’ve got you covered: a Halloween cloche. Halloween cloches are the perfect small DIY project to start the festivities. They’re cute, simple, inexpensive, and perfect for people of all ages.
In this blog, I’ll walk you through how creative and innovative you can get with personalizing your own, getting the materials you need, and making your spooky décor come to life!

To Cloche or Not to Cloche
Even if you’ve never heard the word “cloche,” chances are you’ve probably already seen one. Cloches are little domes that protect plants from harsh weather. Think of the flower from Beauty and the Beast. Remember the glass it was in? That’s a cloche! Sometimes, there’s a cover closing it at the bottom, like the one we’ll make today. And I promise, even without the rose, it’ll still be magical.
Although cloches were created to protect plants, in the sweet new age of Pinterest, we humans, in all our creative glory, have started using them in SO many other decorative ways. I’ve seen them as wedding centerpieces, candle covers, displays for keepsake items, and other seasonal DIY crafts. Sometimes, they still serve as beautiful and creative ways to house and display indoor and outdoor plants (sometimes even dried flowers).
And if you thought they were only to be brought out for fancy occasions, think again. You can style them for any occasion, from fun to fancy.
But, since Halloween is right around the corner and you’re on the hunt for some spooky décor, let’s make a cloche that will be a perfect addition to your fun, scary homemade Halloween decorations.
Create Your Own Halloween Cloche
As someone who loves making ordinary things beautiful, I think cloches allow us to accomplish that on a small, simple, and affordable scale. I love them even more because they’re so easy to change up! I can keep something classy in there year-round or switch it up for the holidays. And that’s precisely what I did when I created my Halloween cloche!
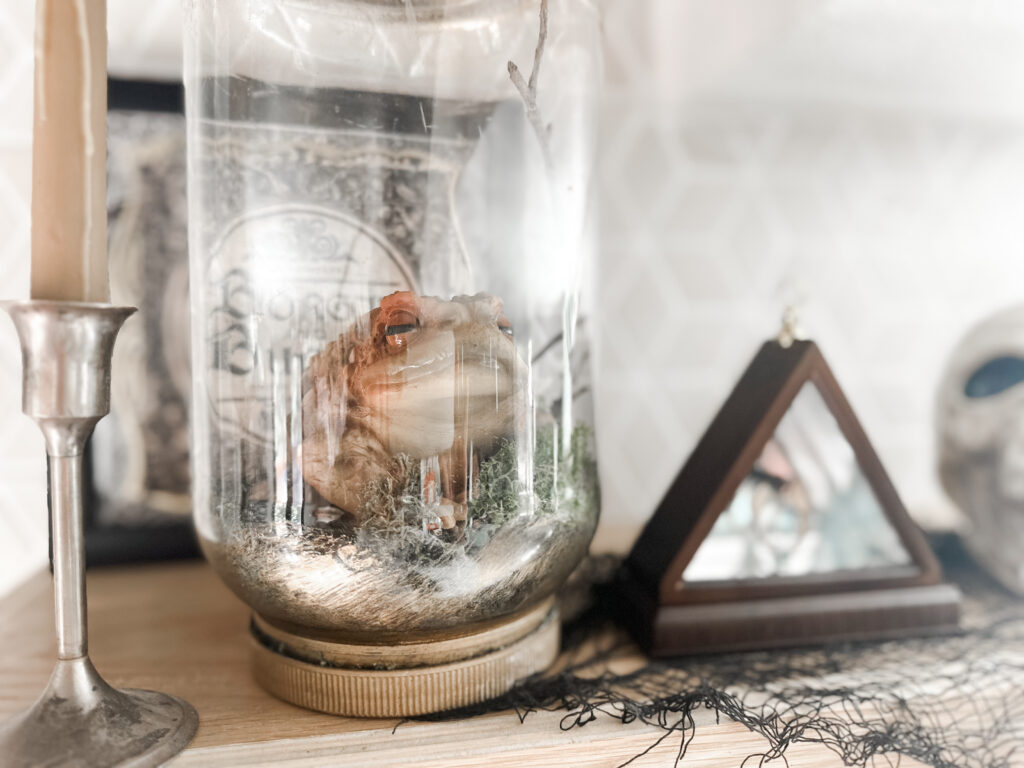
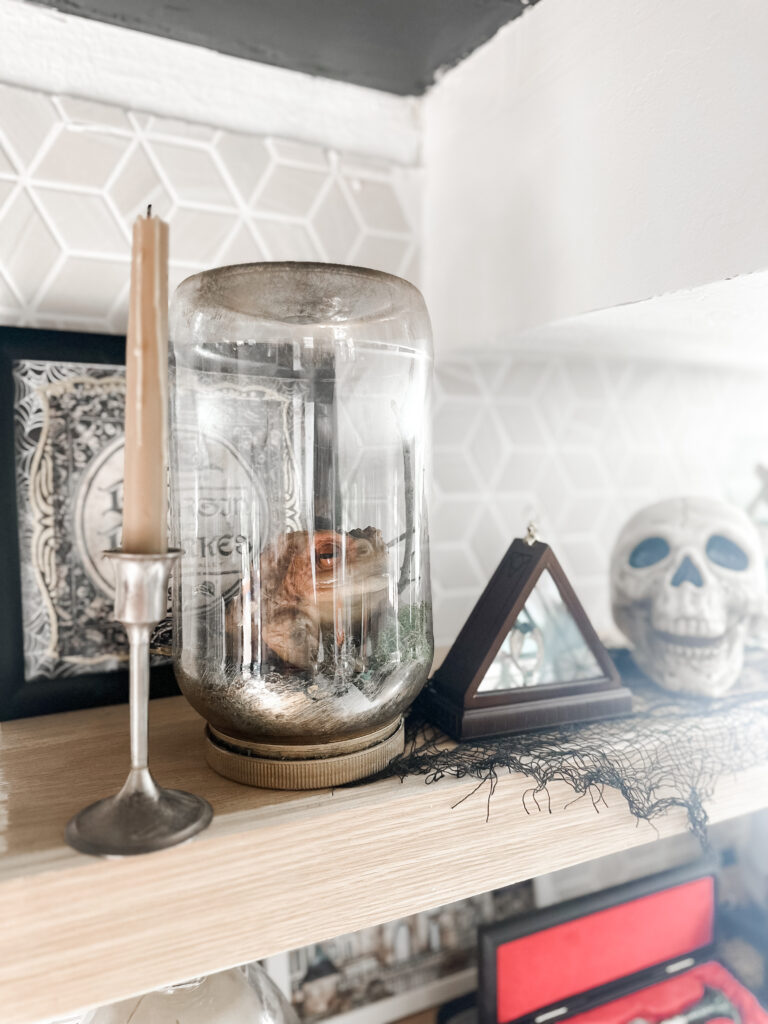
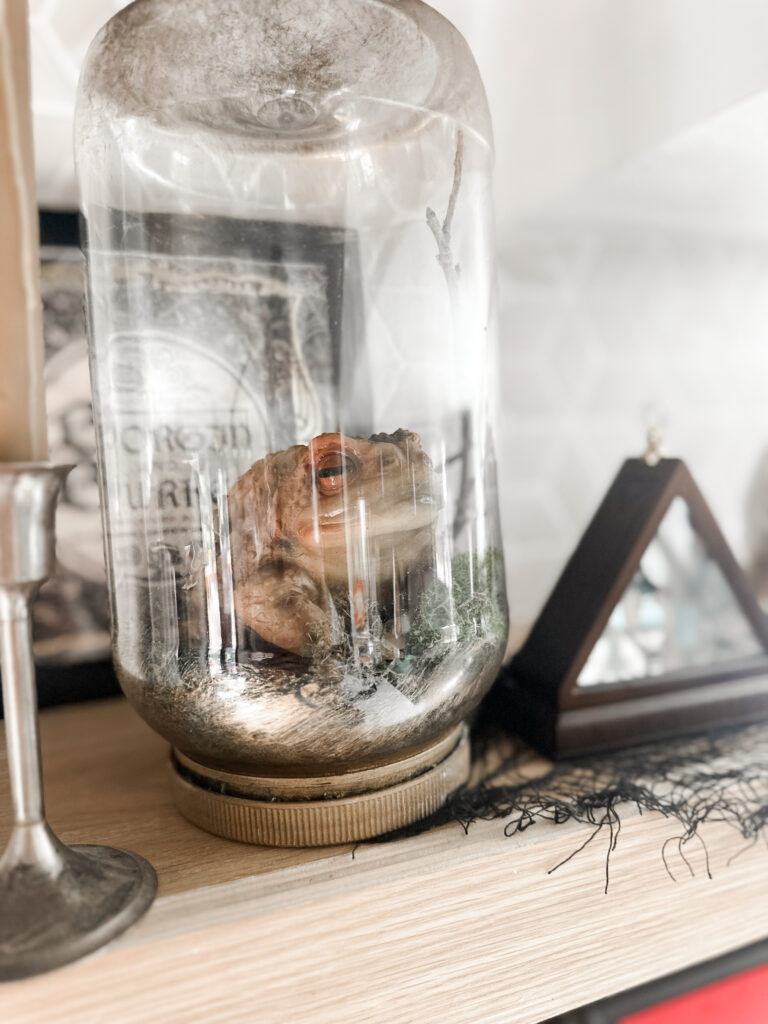
To add spooky décor to my kitchen, I took an ordinary jar, sprinkled some of my millennial love on it (aka gave it a Harry Potter Halloween theme), and immediately brought in the festive vibe I was looking for.
Here’s how you can do the same:
Step #1: Decide Your Theme
Before you start shopping for anything, you’ll want to consider the Halloween theme you’re going for with your cloche. I had a Harry Potter Halloween theme, so my materials and the ideas I’ll share here center around that concept. But again, this is all about letting your creativity shine, so think about what you love about Halloween, maybe your favorite movies or activities, and go from there.
Step #2: Get Your Materials
Once you have your theme, it’s time to get creative with the materials. While you can get a little bougie with it and buy a real deal cloche from Target or Home Goods, the truth is, you can also get a durable and good-quality jar, flip it over, and call it a day. Who doesn’t want to save a few extra bucks with the holidays coming up?
The next step is to get the materials to set the scene inside. My Harry Potter Halloween theme was a dedication to Neville Longbottom (from the Harry Potter series) and his toad, Trevor. My idea was to create a scene that reflected where Trevor went the entire time he disappeared during Neville’s first year. Somewhere grassy and outdoors.
To set my scene, I purchased moss to give the bottom of the jar a nice grassy look for Trevor to sit in. Then I bought the only frog I’d ever actually touch (a plastic one) to replicate Trevor. To dress up the theme a little more, I clipped some branches straight off a tree outside my house and bought some Rub ‘n Buff to give the jar a stained look that shouts “amphibian house” and gives some spooky vibes. Finally, I got out my hot glue gun to pull it all together.
Step #3: Bring It to Life!
Once you’ve decided on your theme and collected all your creative materials, it’s time to sit down and go to work! Although your cloche will most likely stay in one spot, it’s best to be safe and ensure everything stays in its place: thus, the hot glue gun!
Take a moment to put everything together the way you see it in your mind, then glue it in place! For my Halloween cloche, you can check out the finished product here. I glued all the moss to the bottom of the jar before gluing Trevor right in the center of it. After that, I glued in the branches where I wanted them to stick, then added the Rub ’n Buff to the bottom and top of the cloche to give it the finishing touch that brought it all to life.
Remember, my steps are to help you get started. If you’re inspired to try something different and make it your own, go for it!


Don’t Mask Your Creativity
The way I see it, you only get to be your spooky self once a year. So why not celebrate it all month long? Who says you must wait until the month’s end to get in the spirit? When you indulge in the festive fun of holiday house décor, you get to feel the infectious energy of the season all month long.
So make that Halloween cloche! Give a nod to your favorite Harry Potter house, show your love for a Tim Burton movie, or let the kids create something for a not-so-scary Mickey Mouse Halloween. Deciding your theme is half the fun, but getting creative with the materials and putting it together is the other. Your Halloween cloche is yours, and I can’t wait to see what you create!
For more scary homemade Halloween decorations or holiday house décor, follow me on Instagram!
