

From Facebook Freebie to Designer Dresser: My Melamine Furniture Flip
This post may contain affiliate links, meaning I get a commission if you purchase through my links, at no cost to you.
When you flip furniture, the key is making it way better than how you found it. The old saying, “One woman’s trash is another woman’s treasure,” is my mantra whenever I scope out my next flip project. As I scroll through Craigslist or Facebook Marketplace, the options are endless, but it’s all about finding a piece with potential (check out my free furniture flip supply list to try flipping your first piece!).
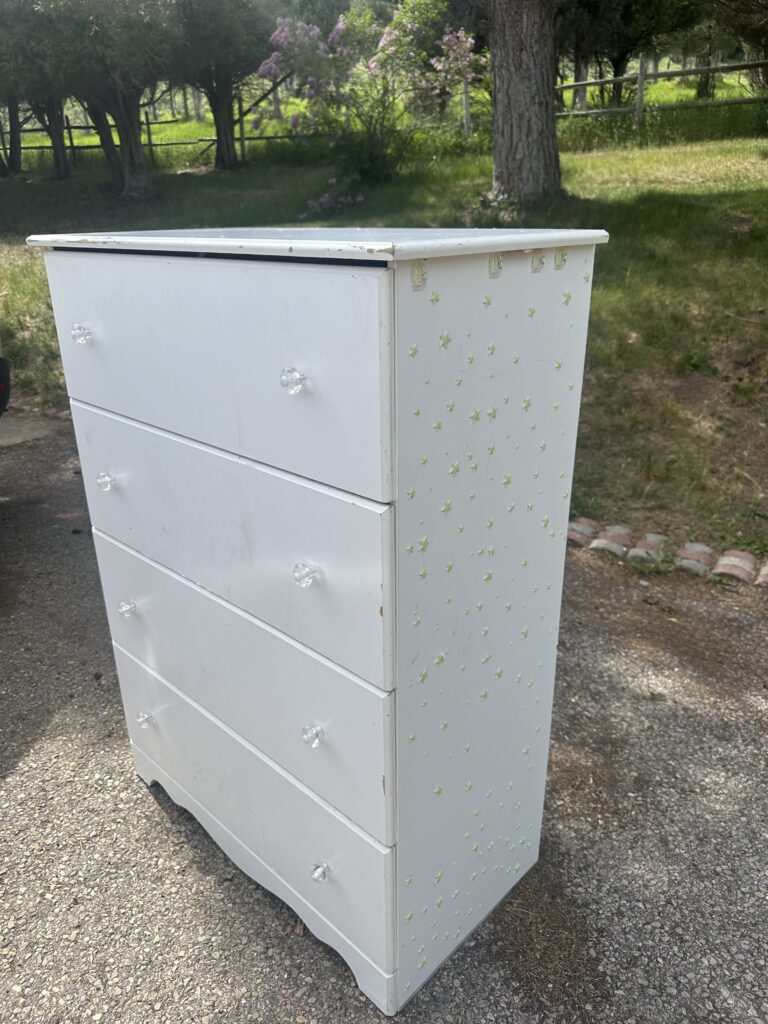
Recently, I came across a melamine furniture find in the form of an off-white dresser adorned with glow-in-the-dark stickers, a hidden “live, laugh, love” message, and enough marks and scuffs to prove this piece stood the test of time. When the owners decided to give it away on the Internet, I jumped at the opportunity to bring new life into this dresser that had seen better days.
After picking up the piece and lugging it home, the question remained: Could I make this melamine dresser I got on Facebook Marketplace for free to look designer? I had high hopes and a lot of scrap material lying around at home to make it happen! And make it happen, I did. Want to see how? Check out my Instagram recap reel and follow along with my step-by-step guide ahead!
But First, What is Melamine?
If you’re thinking, Kenna, what in the world is “melamine?” Don’t worry, I got you! So, melamine in furniture refers to the resin used as a laminate coating. It helps create a scratch-resistant and stain-resistant surface on medium-density fiberboard or particleboard. If you’re looking for an affordable furniture option, melamine material is popular for anyone ballin’ on a budget. For those of you wondering, “Is melamine plastic?” Yep, it sure is! It’s a type of plastic coating, so it’s super durable and perfect for furniture.
A New Start with My DIY Dresser Makeover
Whether you’re here for furniture flipping ideas or DIY dresser painting ideas, this project covers it all! I couldn’t wait to fully reimagine this dresser and hopefully make a nice profit in the process. However, if you’re like me and end up creating a showroom-worthy piece that’s totally your style, you may have to decide whether you want to “love it or list it” (if you like money, though, I recommend the latter).
Here are the tools I used:
- TrueCoat 360 Paint Sprayer
- Sandpaper Discs (80, 150 and 220-grit)
- HART Nail Gun
- Liquid Cleaner and Degreaser
Now, onto how I brought new life to this free Facebook find:
Step 1: A Deep Clean (and Some Unexpected Treasures)
Before anything else, I always start with a thorough cleaning for a furniture flip. This one came with a bonus—an entire galaxy of star stickers. This worn-out dresser’s former home was likely in a kid’s room based on the thoughtfully placed glow-in-the-dark décor. After using a degreaser spray and scraping them off (they’re still all over my driveway, let me know if you want some!), I removed all the hardware and got to work prepping the surface.
Step 2: Scuff Sanding Is a Must for Melamine Wood
Can you paint melamine? Yes, you can! But it’s important to note that when working with melamine, scuff sanding is essential to prep it for painting or staining. Melamine is smooth and non-porous, meaning paint and adhesives have a hard time sticking without a little grit. A quick sand with medium-grit sandpaper gave me the perfect base for my makeover. I used my trusty paint sprayer to give the dresser a nice and even coat all over.
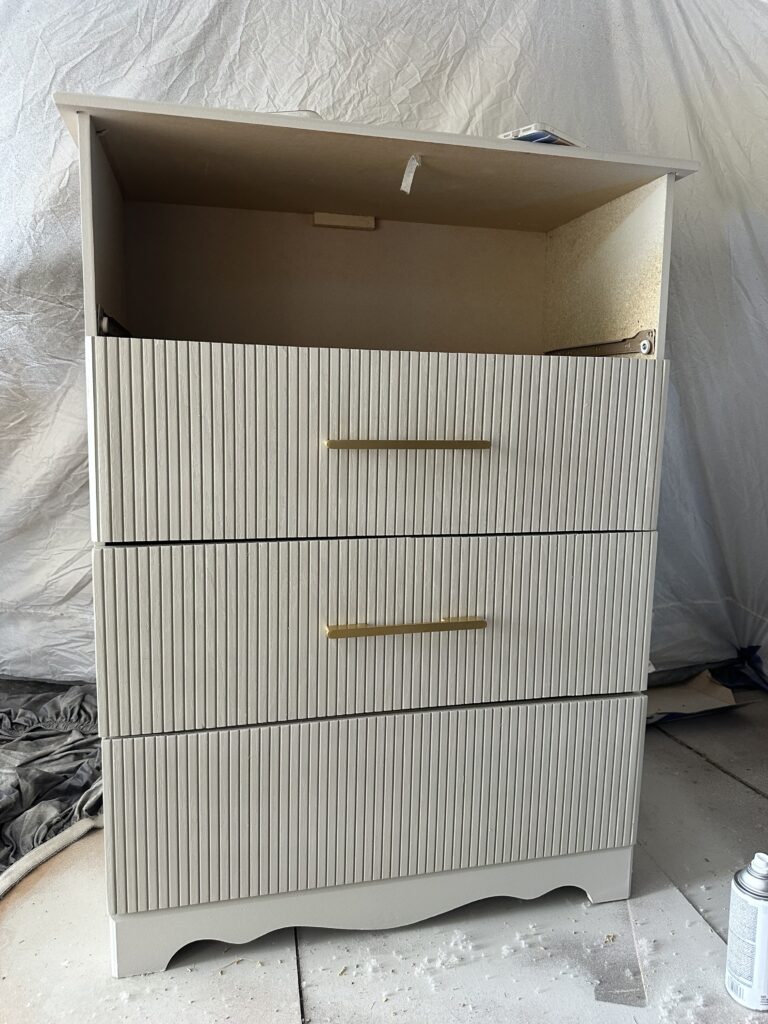
Step 3: Giving It a Designer Look with Pole Wrap
I had some leftover pole wrap sitting in my garage from another project (the flip house!), and I knew it would be the perfect way to elevate this DIY dresser. If you aren’t sure what pole wrap is, it’s my fave way to add a fluted wood aesthetic in an easy-to-apply sheet form—a true furniture flipper’s BFF! (No actual poles were wrapped in the making of this dresser.)
Instead of attaching pole wrap sheets to all the drawers at once, which I’ve seen others do and found to be a major headache, I secured each piece separately using wood glue, nails, and a nail gun. This pole wrapping method made the process much easier and gave me a flawless finish.
Step 4: The Magic of Wood Filler and Sanding
After attaching the pole wrap, I went in with wood filler to smooth out any seams or gaps. Once dry, I gave everything another sanding—this time with 220-grit sandpaper—for a buttery smooth surface. I also made sure to fix the bottoms on a few of the drawers, and then I used Bondo on the sides to fill any dents, holes, or scratches.
Step 5: The Finishing Touches
The transformation was nearly complete, but hardware is what really takes a piece from basic to high-end. I chose sleek, modern, gold-finished pulls that instantly made the dresser look like something straight out of a designer showroom. And for a unique touch, I lined the drawers with a sophisticated and moody floral print liner that gives “oh, she fancy!” vibes.
The Final Verdict on My Furniture Flip
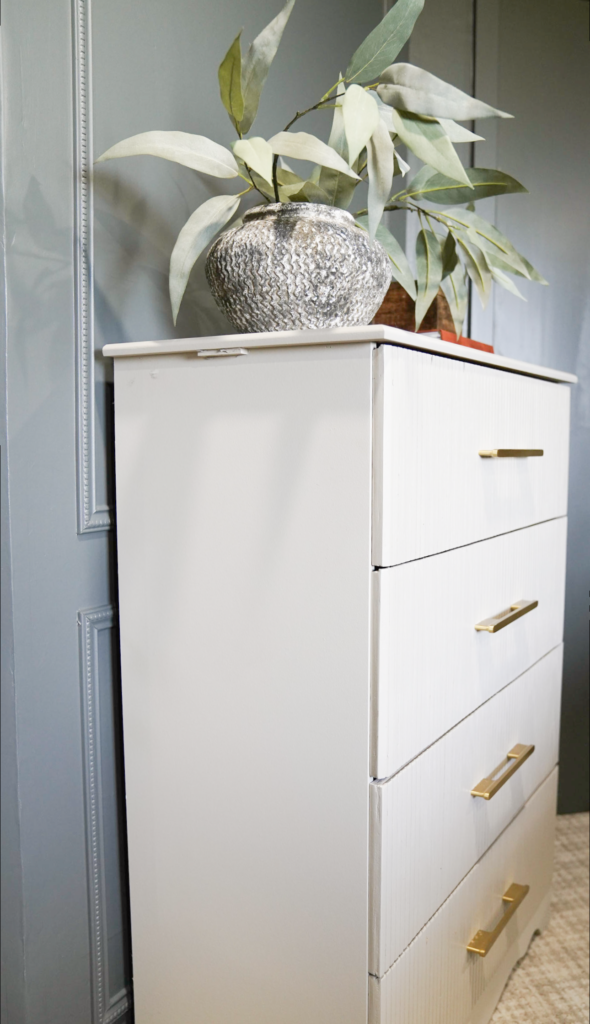
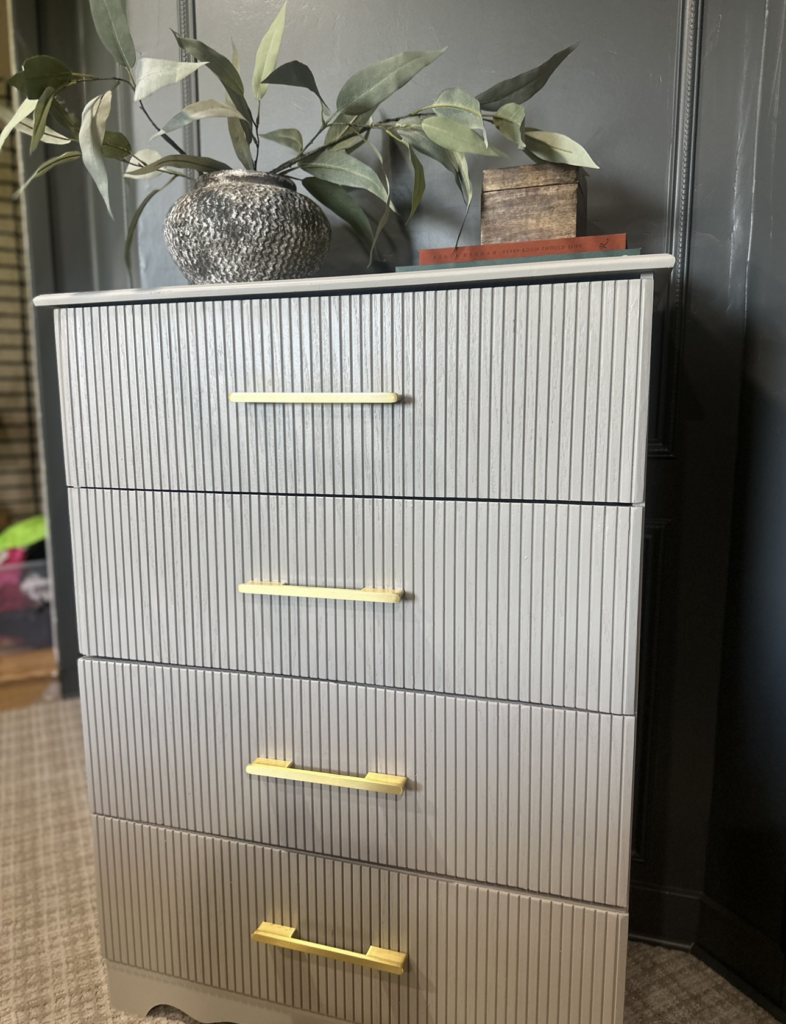
So, what do you think? Pretty snazzy, right? What was once a bland, boring, and tired dresser transformed into a sleek and modern beauty. Originally, I planned to resell this melamine furniture makeover piece, but honestly? I kinda want to keep it for myself. This freebie-turned-designer-dresser is proof that a little creativity (and some leftover materials) can go a long way!
Want to tackle your own furniture flip? Grab my Free Furniture Flip Supply List so you have everything you need to get started!
Let me know—would you have flipped this dresser or left it as-is? Drop a comment below!

